
Alright, let’s talk about one of the messiest flavor combos known to mankind: peanut butter and marshmallow fluff. Sounds like a sticky situation, right? Especially when you sandwich it between two slices of white bread and call it lunch. (Who came up with that idea, anyway?!) But while the original fluffernutter sandwich might not be everyone’s cup of tea, this dessert version? Oh, it’s a game-changer.
These Fluffernutter Bars are everything you want in a dessert: soft, chewy, gooey, sweet, salty, and—dare I say—addictive. If you’ve ever found yourself standing in front of the pantry with a spoonful of peanut butter in one hand and a marshmallow in the other (no judgment), then this recipe is your destiny.
Let’s break it down.
At the bottom, you’ve got this rich, soft peanut butter blondie base. It’s buttery and chewy with just enough sweetness to balance that savory peanut goodness. The kind of treat that proudly earns a spot among your favorite Mini Peanut Butter Desserts and other Desserts Made With Butter.
Then comes the magic: a thick, dreamy layer of marshmallow fluff. It melts into the bar ever so slightly as it bakes, giving you that ooey-gooey bite that just pulls you back in for another square. If you’re a fan of Baked Goods With Marshmallows, this one’s about to be your new obsession.
But we’re not stopping there. Oh no.
You’ll reserve some of that blondie dough from the base, then crumble it over the top of the marshmallow layer. This way, the marshmallow fluff gets a warm hug from all sides—top and bottom—locked in with chewy peanut butter goodness.
Essentially, it’s a peanut butter sandwich’s cooler, more delicious cousin.
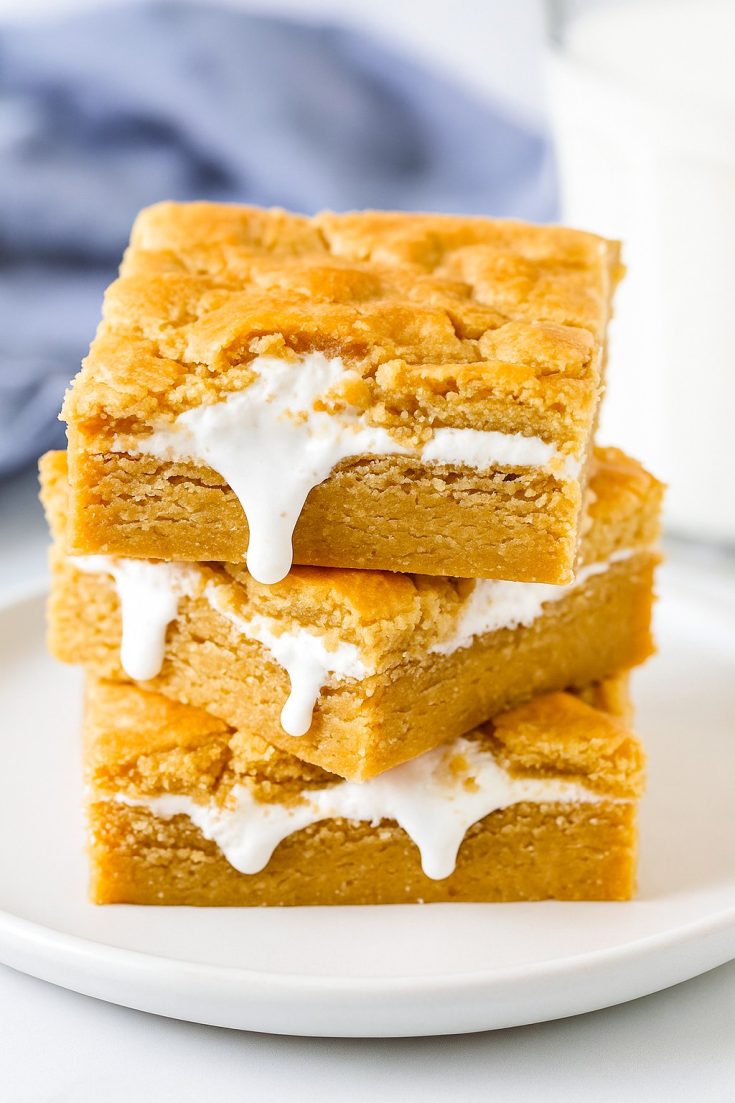
And can we talk texture? You’ve got chewy edges, a soft center, and that gooey stretch of marshmallow when you take a bite. It’s the kind of dessert that disappears from the pan way too fast—and has everyone asking, “Wait, did you make these yourself?!”
Honestly, these bars are a hit with all ages—making them one of the Best Kids Desserts out there. They’re also perfect as Family Friendly Desserts, whether you’re baking with your little helpers or just whipping up a quick treat for a weeknight movie night.
They even have State Fair Desserts energy—colorful, nostalgic, and guaranteed to wow a crowd. I mean, tell me these wouldn’t fit right in next to deep-fried Oreos and funnel cakes?
Pro Tips to Make ‘Em Perfect:
Let the bars cool for at least an hour before slicing. Yes, I know, the smell will tempt you. But trust me, they need time to firm up so they don’t turn into a marshmallow avalanche when you cut in.
Use the parchment paper overhang to lift the bars out of the pan. It makes slicing so much easier.
- Lightly spray your knife with non-stick spray before cutting. That marshmallow fluff is clingy AF. This little trick saves you from a sticky mess—and helps get clean, Insta-worthy slices.
Fluffernutter Bars – A Fun & Easy Family Friendly Dessert!

These bars are the ultimate treat if you're into that irresistible sweet-and-salty combo. Think: tender, peanut butter-packed cookie base, a gooey cloud of marshmallow fluff, and golden peanut butter crumbles on top. Whether you're a fan of the nostalgic sandwich or just obsessed with peanut butter desserts, these bars are seriously next level.
Ingredients
- 2¼ cups all-purpose flour
- 1 teaspoon baking powder
- ¼ teaspoon salt
- ¾ cup unsalted butter, softened to room temp
- ¾ cup packed brown sugar
- ⅓ cup granulated sugar
- 1½ cups creamy peanut butter (not the natural kind*)
- 1 large egg
- 1 large egg yolk (just the yolk—toss the white)
- 1 jar (7 oz) marshmallow creme (aka fluff)
Instructions
- Preheat your oven to 350°F (175°C). Adjust the rack to the center position.
- Prep your pan: Line a 9x13-inch baking dish with parchment paper, letting it hang slightly over the sides for easy lifting later. You can also use foil and lightly grease it.
- Mix the dry stuff: In a medium bowl, whisk together your flour, baking powder, and salt. Set aside.
- In a separate large mixing bowl, beat together the softened butter, brown sugar, and white sugar until it’s light and creamy.
- Mix in the peanut butter until everything’s smooth and fully combined.
- Add the egg and egg yolk, and beat again until the mixture is velvety.
- Reduce the mixer speed and slowly stir in the dry flour mixture—add it in two batches to make sure everything blends evenly.
- Scoop out about 1 cup of the peanut butter dough and set it aside for later.
- Press the remaining dough evenly into your prepared pan, smoothing it out to form a solid base.
- Bake for 25 minutes, or until the surface looks dry and fully set. The edges might turn slightly golden.
- Pull the pan out of the oven, but keep the oven on.
- Carefully spread the marshmallow fluff over the baked peanut butter layer. It’s sticky, so work slowly—an offset spatula helps here!
- Grab that reserved dough and pinch off small pieces. Flatten each into rough 1-inch rounds and scatter them over the marshmallow layer. Don’t worry about full coverage—about 80–90% is perfect.
- Return the pan to the oven and bake for 10 more minutes, just until the peanut butter topping looks baked through and slightly golden.
- Take the bars out and cool completely at room temp—at least 1 hour—before you even think about slicing.
- Once cooled, lift the bars out of the pan using the parchment or foil overhang and transfer them to a cutting board.
- For clean cuts, lightly spray a sharp knife with cooking spray (totally optional but super helpful), and slice into bars.
Fluffernutter Bars – A Fun & Easy Family Friendly Dessert!
These bars are the ultimate treat if you're into that irresistible sweet-and-salty combo. Think: tender, peanut butter-packed cookie base, a gooey cloud of marshmallow fluff, and golden peanut butter crumbles on top. Whether you're a fan of the nostalgic sandwich or just obsessed with peanut butter desserts, these bars are seriously next level.
Ingredients
- 2¼ cups all-purpose flour
- 1 teaspoon baking powder
- ¼ teaspoon salt
- ¾ cup unsalted butter, softened to room temp
- ¾ cup packed brown sugar
- ⅓ cup granulated sugar
- 1½ cups creamy peanut butter (not the natural kind*)
- 1 large egg
- 1 large egg yolk (just the yolk—toss the white)
- 1 jar (7 oz) marshmallow creme (aka fluff)
Instructions
- Preheat your oven to 350°F (175°C). Adjust the rack to the center position.
- Prep your pan: Line a 9x13-inch baking dish with parchment paper, letting it hang slightly over the sides for easy lifting later. You can also use foil and lightly grease it.
- Mix the dry stuff: In a medium bowl, whisk together your flour, baking powder, and salt. Set aside.
- In a separate large mixing bowl, beat together the softened butter, brown sugar, and white sugar until it’s light and creamy.
- Mix in the peanut butter until everything’s smooth and fully combined.
- Add the egg and egg yolk, and beat again until the mixture is velvety.
- Reduce the mixer speed and slowly stir in the dry flour mixture—add it in two batches to make sure everything blends evenly.
- Scoop out about 1 cup of the peanut butter dough and set it aside for later.
- Press the remaining dough evenly into your prepared pan, smoothing it out to form a solid base.
- Bake for 25 minutes, or until the surface looks dry and fully set. The edges might turn slightly golden.
- Pull the pan out of the oven, but keep the oven on.
- Carefully spread the marshmallow fluff over the baked peanut butter layer. It’s sticky, so work slowly—an offset spatula helps here!
- Grab that reserved dough and pinch off small pieces. Flatten each into rough 1-inch rounds and scatter them over the marshmallow layer. Don’t worry about full coverage—about 80–90% is perfect.
- Return the pan to the oven and bake for 10 more minutes, just until the peanut butter topping looks baked through and slightly golden.
- Take the bars out and cool completely at room temp—at least 1 hour—before you even think about slicing.
- Once cooled, lift the bars out of the pan using the parchment or foil overhang and transfer them to a cutting board.
- For clean cuts, lightly spray a sharp knife with cooking spray (totally optional but super helpful), and slice into bars.

Welcome to Mariasskitchen.com! I’m Maria Tarrant, the proud owner and passionate curator of this website. As an avid lover of all things dessert, baking, and traveling, I’ve combined my passions to create a platform where I can share my culinary adventures and inspirations with you. From decadent cakes to scrumptious cookies, this website is a haven for dessert enthusiasts looking to explore the sweet side of life.
Join me on this delectable journey as I whip up mouthwatering recipes, offer baking tips and tricks, and take you along on my exciting travel escapades, discovering flavors from around the world. MariasSkitchen.com is a place where I pour my heart and soul into each post, hoping to ignite your own culinary passions and create unforgettable memories. So, grab a spoon, pack your bags, and let’s embark on this extraordinary adventure together!