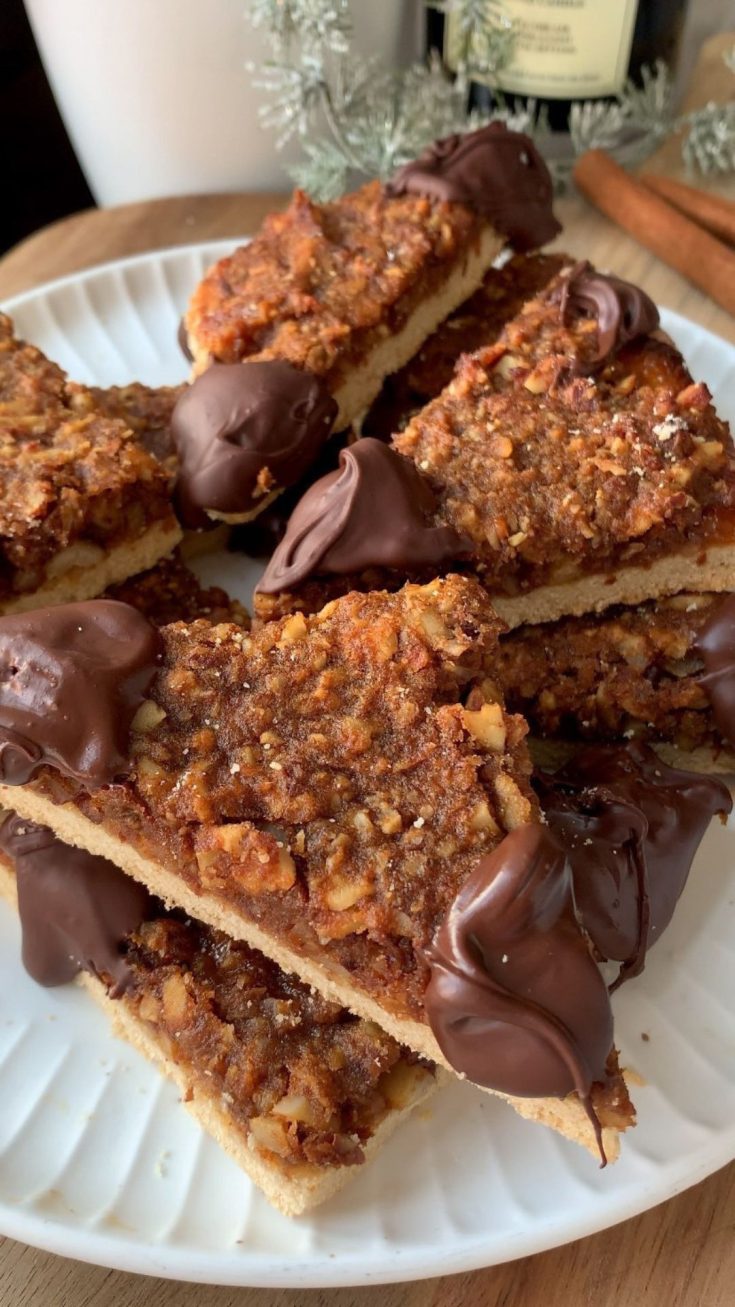
Introducing the German Nut Corner—these are hands down one of my favorite Christmas cookies! 😍🎄 They’re a bit like those pecan pie bars you might be familiar with, but I’ve given them a healthier twist by skipping the white sugar and tossing in some protein powder.
German Nut Corner
Ingredients
- For the based:
- 1/2 cup (60g) almond or oat flour (or regular flour)
- 1/2 cup (60g) rice flour (or regular flour)
- 1/4 cup (30g) vegan protein powder (I used @vetain_de cinnamon protein)
- 1/2 tsp baking powder
- 1/4 cup (30g) birch sugar (or any other refined sugar)
- 3 tbsp (vegan) cold butter
- 1 egg or 2 tbsp apple puree
- For the middle layer, just 1-2 tbsp of sugar-free apricot jam will do.
- And for the top layer:
- 3/4 cup (90g) nuts of your choice (I used almonds, hazelnuts & pecans)
- 3 tbsp (25g) coconut sugar (or any other refined sugar)
- 2 tbsp (25g) vegan butter, melted
- 1/2 cup (100g) apricot-apple puree (or just apple)
- Optional: 1.4 oz (40g) dark chocolate
Instructions
- Base Creation: Start by stirring together the flours, protein powder, baking powder, and your sugar of choice. Add in the cold, cubed butter and knead until you've got streusel. Then toss in the egg or apple puree, kneading until you've got a soft dough. If it's too wet, throw in a bit more flour. Let it chill in the fridge for 10 minutes while you whip up the top layer.
- Top Layer Magic: Chuck all those top layer ingredients into a food processor and blitz until it's crumbly. (If you're sans food processor, chop all the nuts and stir in the other ingredients).
- Assembly & Baking: Roll out the dough into a rectangle (aim for 0.5 cm thick). Slather on the jam and sprinkle on the nut mixture, smoothing it out evenly. Then, bake it at 180°C for 20 minutes until it's golden brown. Let it cool completely before cutting into triangles and, for an extra touch, dipping the corners in melted chocolate. Pop it in the fridge, and get ready to savor the goodness! 🥰

Welcome to Mariasskitchen.com! I’m Maria Tarrant, the proud owner and passionate curator of this website. As an avid lover of all things dessert, baking, and traveling, I’ve combined my passions to create a platform where I can share my culinary adventures and inspirations with you. From decadent cakes to scrumptious cookies, this website is a haven for dessert enthusiasts looking to explore the sweet side of life.
Join me on this delectable journey as I whip up mouthwatering recipes, offer baking tips and tricks, and take you along on my exciting travel escapades, discovering flavors from around the world. MariasSkitchen.com is a place where I pour my heart and soul into each post, hoping to ignite your own culinary passions and create unforgettable memories. So, grab a spoon, pack your bags, and let’s embark on this extraordinary adventure together!