Let’s dive into creating the most delightful meringue kisses, the kind that are crispy, sweet, and simply melt in your mouth. These little drops of joy are not only perfect for special occasions like birthdays, holidays, or Valentine’s Day but also make a treat your family and friends will adore.
Here’s what you’ll need:
Ingredients:
- 3 large egg whites (about 100 grams)
- 1 cup of caster sugar (that’s around 200 grams)
- A pinch of salt
- 1/4 teaspoon of cream of tartar (if you like)
- Gel food coloring (if you want to get creative)
- 1 teaspoon of vanilla extract
Here’s how to whip them up:
- To kick things off, preheat your oven to 200°F (or approximately 100°C), and make sure you’ve got one or two baking sheets lined with parchment paper. Set them aside.
- Now, let’s get those egg whites in a large, squeaky clean bowl or the bowl of a stand mixer. Add a pinch of salt and the optional cream of tartar. Start beating those egg whites on low speed and gradually ramp up to high. When they turn all foamy, it’s sugar time! Add the sugar, one tiny teaspoon at a time, while keeping that mixer going.
- Keep that mixer on high until the meringue goes all glossy and incredibly stiff. It’s like magic in the making.
- Let’s introduce some flavor – stir in the vanilla extract, and if you’re feeling adventurous, now’s the time to add a dash of gel food coloring for some fun shades.
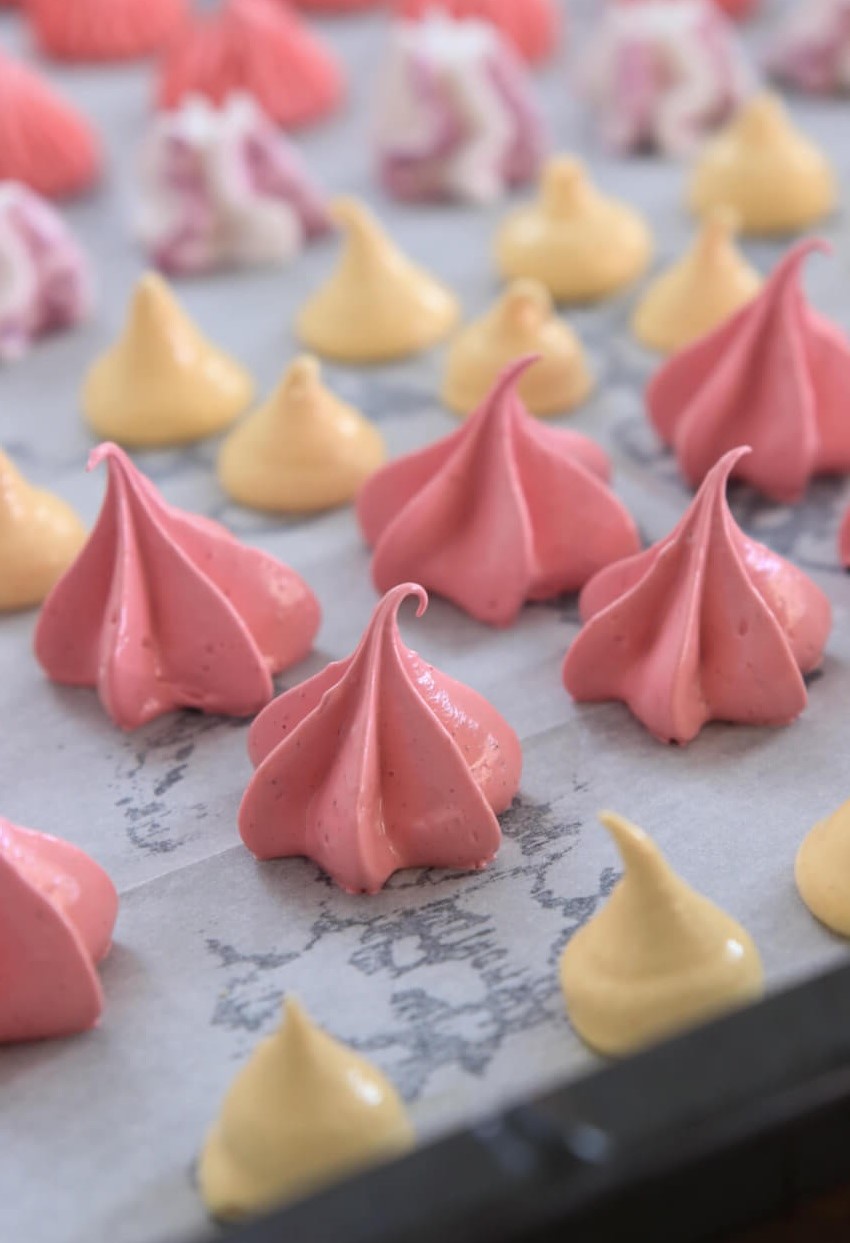
- Grab a piping bag, fit it with the tip or nozzle of your choice, or you can simply snip off the end of the bag if you don’t have a tip. If you want to go for colorful kisses, drop in some gel food coloring strips inside the pastry bag before filling it (there’s a video to show you how).
- It’s time to pipe those kisses onto your parchment-lined trays. Squeeze gently on the piping bag while slowly pulling up before giving it a quick lift-off to create that classic meringue kiss shape.
- Now, slide those trays onto the center rack of your oven and let them bake for around an hour. After that, switch off the oven and keep it closed for another 1-2 hours. This is the secret to achieving that melt-in-your-mouth magic.
Now, a few extra notes and tips for the best meringue kisses:
- How long will these little delights last, you ask? Pop them in an airtight container, and they’ll be good for up to 2 weeks. To keep them in their best shape, store them in a dry environment; otherwise, they might get a bit sticky after a few days.
- If your meringue isn’t stiff, remember to use room temperature egg whites, ensure there are no egg yolks sneaking in, and make sure your bowl is squeaky clean, dry, and grease-free. Plastic bowls are a no-go. Add that sugar gradually, a teaspoon at a time. If you can lay your hands on cream of tartar, use it from the get-go; it’ll help you achieve that ultimate stiff meringue.
- You can absolutely use a hand mixer to whip up these meringue cookies. It might take a bit longer, but it’ll get the job done.
- Keep those kisses smooth by piping the meringue as soon as it’s ready. It tends to lose its consistency if it sits around too long. If you’re using food coloring, add it while you’re whisking and not while folding, as shown in the video; it might affect the consistency.
- Liquid food coloring? Nah, it’s not the best option. Go for gel food coloring; it’s the meringue’s best friend.
- Want to infuse more flavor into your meringue kisses? Try different extracts like almond, rum, orange blossom, rose water, coconut, raspberry, or any flavor you fancy. A teaspoon should do the trick.
Get ready for a batch of the most delightful meringue kisses you’ve ever laid your eyes (and taste buds) on!

Welcome to Mariasskitchen.com! I’m Maria Tarrant, the proud owner and passionate curator of this website. As an avid lover of all things dessert, baking, and traveling, I’ve combined my passions to create a platform where I can share my culinary adventures and inspirations with you. From decadent cakes to scrumptious cookies, this website is a haven for dessert enthusiasts looking to explore the sweet side of life.
Join me on this delectable journey as I whip up mouthwatering recipes, offer baking tips and tricks, and take you along on my exciting travel escapades, discovering flavors from around the world. MariasSkitchen.com is a place where I pour my heart and soul into each post, hoping to ignite your own culinary passions and create unforgettable memories. So, grab a spoon, pack your bags, and let’s embark on this extraordinary adventure together!